How to Sight a Thermal Scope in 7 Easy Steps
To sight your thermal scope accurately and efficiently, follow these 7 easy steps designed to help you achieve a perfect zero. Properly mounting and securing your rifle and thermal scope is crucial for consistent results. Ensuring correct alignment and optimal eye relief will enhance your shooting experience and accuracy.
Choose a stable environment with a clear target that has a consistent thermal signature. Power on the thermal scope and adjust the windage and elevation settings to align your reticle with the target center at your chosen zero distance.
Take test shots to evaluate your initial adjustments, then fine-tune the settings as needed. Confirm your scope’s accuracy at multiple ranges to ensure reliability in various shooting conditions.
Keep following the guide to reveal detailed tips for flawless zeroing and maintenance.
Key Takeaways
- Securely mount and stabilize the rifle, then power on and warm up the thermal scope for optimal operation.
- Choose a clear target with consistent thermal signature in stable, low-wind, and thermally contrasting conditions.
- Align the reticle with the target center and adjust elevation and windage dials to zero the scope at the desired distance.
- Take test shots, observe impact points, and fine-tune windage and elevation settings for accurate alignment.
- Confirm scope alignment, tighten all mounting screws securely, and verify accuracy at multiple ranges for consistent performance.
Preparing Your Scope and Rifle for Sighting
Before you begin sighting your thermal scope, make sure your rifle is securely mounted and stable. This stability is vital for accurate adjustments and prevents errors caused by movement. Next, power on your thermal scope and allow it to warm up; this guarantees the display and sensor operate effectively.
Check the battery level to avoid interruptions during sighting. Clean your scope’s lens gently with a microfiber cloth to remove dust or smudges that could distort the thermal image. Also, verify that your scope is properly attached to the rifle’s rail system, ensuring screws or mounts are tight but not over-torqued.
Familiarize yourself with your scope’s settings and reticle options, so you can make precise adjustments later. Finally, pick a suitable target at a known distance—preferably something with a consistent heat signature—to make sighting easier. Taking these preparatory steps will set you up for a smooth and accurate thermal sighting process.
Mounting and Aligning Your Thermal Scope Correctly
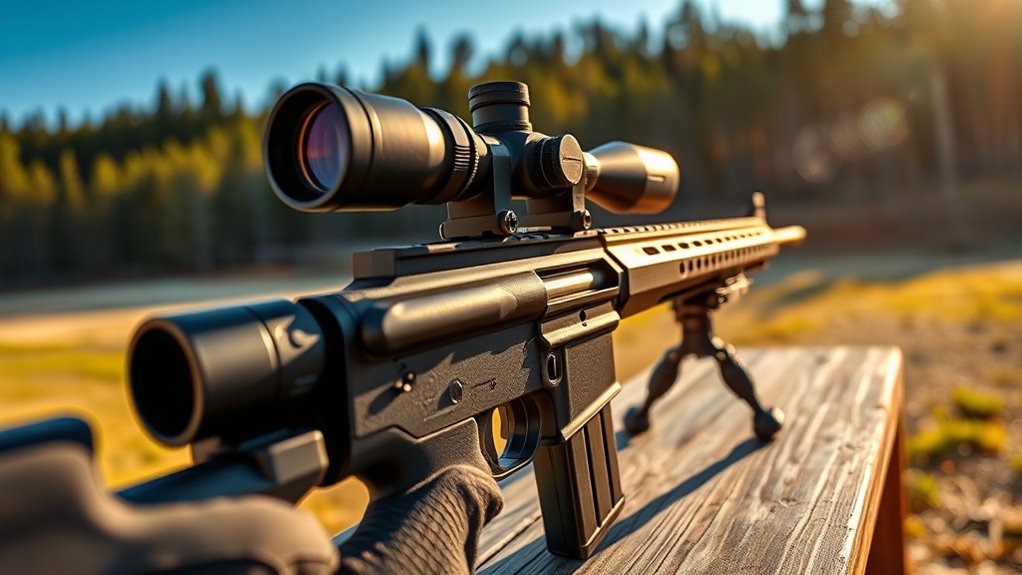
When you’re mounting your thermal scope, ensuring it’s properly aligned with your rifle is essential for accuracy. Start by securely attaching the scope to the rail system, making sure it sits firmly without any wobble.
Next, check the eye relief to ensure you have a full, clear view through the scope without straining your neck or eyes. Finally, align the reticle so it’s parallel with the barrel, preventing any canting that could throw off your shot.
Focus on these key steps:
- Tighten the mounting screws evenly, avoiding overtightening that could damage the scope.
- Position yourself in a natural shooting stance while adjusting eye relief for comfort.
- Use a bubble level on the scope to confirm it’s perfectly horizontal and not tilted.
Choosing the Right Target and Environment for Zeroing Your Thermal Scope
Although you’ve mounted and aligned your thermal scope carefully, choosing the right target and environment is essential for zeroing it accurately. Pick a target that provides a clear thermal signature—something with a consistent heat source, like a warm metal plate or a heat-emitting animal silhouette target. Avoid reflective surfaces, as they can distort the heat image and lead to inaccurate zeroing.
For the environment, aim to zero your scope in stable conditions. Avoid extreme weather like heavy rain, fog, or high winds, which can affect thermal readings and bullet trajectory. Early morning or late evening often offers ideal thermal contrast because of temperature differences between the target and surroundings.
Also, make sure the shooting range has a safe backstop and minimal ambient heat sources nearby, so your scope focuses solely on the target. By carefully selecting both target and environment, you’ll make zeroing your thermal scope much more precise and reliable.
Setting Initial Zero Settings on Your Thermal Scope
Once you’ve picked the right target and environment, it’s time to set the initial zero settings on your thermal scope. Begin by mounting your rifle securely and placing the scope on a stable platform.
Next, adjust the reticle so it aligns with the target’s center at your chosen zero distance—usually 100 yards or meters. This gives you a baseline for accuracy before fine-tuning with live shots.
Focus on these key adjustments:
- Elevation dial: Move the reticle up or down to match the target’s vertical position.
- Windage dial: Shift the reticle left or right to align horizontally.
- Brightness and contrast: Optimize thermal image clarity for clear target distinction.
Test Shots and Adjusting Windage & Elevation
After setting your initial zero, you’ll want to take a few test shots to see how your thermal scope performs in real conditions. Begin by shooting at a target placed at your zeroing distance, noting where the rounds impact compared to your aiming point. If your shots consistently land left or right, adjust the windage turret accordingly.
Likewise, if they’re hitting above or below your point of aim, tweak the elevation turret. Make small adjustments—usually a click or two—and then take another shot to observe the change. This iterative process is essential for dialing in accuracy.
Confirming Your Thermal Scope Zero at Different Distances
Now that you’ve made your initial adjustments, it’s important to verify your thermal scope zero at various distances. You’ll want to pick distances that match your typical shooting scenarios and consider factors like temperature and terrain.
Verifying accuracy across these ranges ensures your scope stays reliable in the field.
Choosing Appropriate Zeroing Distances
Although zeroing your thermal scope at a single distance might seem sufficient, confirming your zero at multiple ranges guarantees consistent accuracy in the field. Choosing the right distances depends on your typical shooting scenarios. You want to cover close, medium, and long-range targets so your scope performs well no matter the situation.
Consider these zeroing distances for a well-rounded setup:
- 25 yards for close encounters where quick target acquisition is essential
- 100 yards to represent common mid-range shots in hunting or tactical use
- 200 yards or beyond for long-distance precision and to account for bullet drop
Adjusting for Environmental Factors
Verifying your zero at different distances is just the start; you’ll also need to account for environmental factors that can shift your point of impact. Temperature changes can affect the thermal scope’s sensor sensitivity, causing image distortion or slight aiming errors. Humidity and atmospheric pressure also influence bullet trajectory, so it’s wise to adjust your hold accordingly.
Wind is another critical factor—it can push your bullet off course, especially at longer ranges. Make it a habit to observe wind direction and speed before each shot. Even terrain elevation changes can impact your zero, so recalibrate if you move to higher or lower ground.
Verifying Accuracy Across Ranges
Once you’ve accounted for environmental factors, the next step is to confirm your thermal scope’s zero at various distances. This assures your shots remain precise whether you’re targeting close or far away. Start by selecting clear, visible targets at different ranges—say 25, 50, and 100 yards.
Fire a few rounds at each distance, noting any deviations. Adjust your scope accordingly to keep your point of impact consistent with your point of aim. Remember, temperature changes and atmospheric conditions can affect bullet trajectory, so this step is vital for reliable performance.
Visualize:
- A crisp animal silhouette at 25 yards
- A distant target obscured by light foliage at 50 yards
- A small steel plate shining faintly at 100 yards
This process guarantees your thermal scope remains accurate no matter the range.
Fine-Tuning and Maintaining Your Thermal Scope Zero
Because even the best thermal scopes can shift zero with regular use, you’ll need to fine-tune and maintain your zero to guarantee consistent accuracy. Start by rechecking your zero at your preferred range after every few uses or transport. Environmental changes like temperature fluctuations can affect calibration, so adjust accordingly.
Regularly clean your scope’s lens and check mounting screws for tightness to avoid zero shift. If you notice a deviation, use incremental adjustments on your windage and elevation turrets until your point of impact matches your point of aim.
Here’s a quick maintenance checklist:
| Task | Frequency | Notes |
|---|---|---|
| Re-zeroing | After every 50 shots | Ensure stable shooting position |
| Lens cleaning | Before each use | Use lens-safe cloth |
| Mount inspection | Weekly | Tighten screws, check alignment |
Frequently Asked Questions
How Does a Thermal Scope Detect Heat Signatures?
A thermal scope detects heat signatures by sensing infrared radiation emitted by objects. It converts this heat into an image you can see, letting you spot warm targets even in total darkness or through smoke and fog.
What Are the Battery Life Expectations for Thermal Scopes?
You can expect 4 to 8 hours of battery life from most thermal scopes, so you won’t be stuck out cold during your hunt.
Just keep spare batteries handy, and you’ll enjoy uninterrupted use easily.
Can Thermal Scopes Be Used Effectively in Daylight?
Yes, you can use thermal scopes effectively in daylight since they detect heat signatures, not light. They work well through smoke, fog, and darkness, giving you clear target visibility regardless of lighting conditions.
This makes them versatile tools for various environments. Thermal scopes provide consistent performance whether it’s day or night.
Their ability to detect heat rather than rely on visible light ensures clear images in challenging conditions.
Are There Legal Restrictions on Using Thermal Scopes for Hunting?
Yes, you might face legal restrictions using thermal scopes for hunting depending on your location. Always check local hunting regulations and laws before using one, as some states or countries prohibit or limit their use during hunts.
What Maintenance Is Required for the Thermal Imaging Sensor?
You’ll want to clean the thermal sensor gently—it’s as delicate as a butterfly’s wing—using a soft cloth and avoid harsh chemicals.
Regularly check for dust or moisture to keep your scope’s vision crystal clear and sharp.
Conclusion
Sighting your thermal scope is like tuning a musical instrument—each adjustment brings your aim closer to perfect harmony. By carefully preparing, mounting, zeroing, and fine-tuning your scope, you’ll hit your target with confidence every time.
Remember, just as a musician regularly checks their instrument, you’ll want to maintain your scope’s zero to keep your shots precise.
With these steps, you’re set to see clearly and shoot accurately, no matter the conditions. Properly sighting your thermal scope ensures optimal performance and reliability in the field. Keep these sighting steps in mind for consistent accuracy and improved shooting results.